Well I've now caught stripers in 3 states. All on a fly rod. I moved to Little Rock 4 months ago, and have been on a mission to figure out how to catch them on a fly in one of the several lakes here that has them in the state. I've spoken to as many people as I can find who at least know of someone who has fly fished for them here, and for some reason its extremely rare. Fly fishing land locked stripers is a known quantity in Georgia, Oklahoma, Missouri, parts of Tennessee, Texas and California, but not Arkansas for some reason. So it's been a lot of trial and error, and scouting late winter and early spring to learn the water as they begin to move shallow in the spring the false spawn.
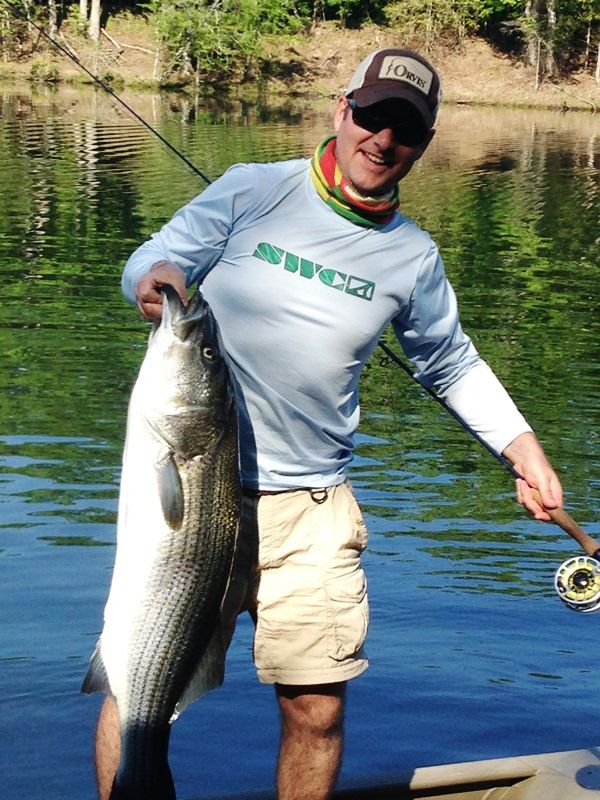
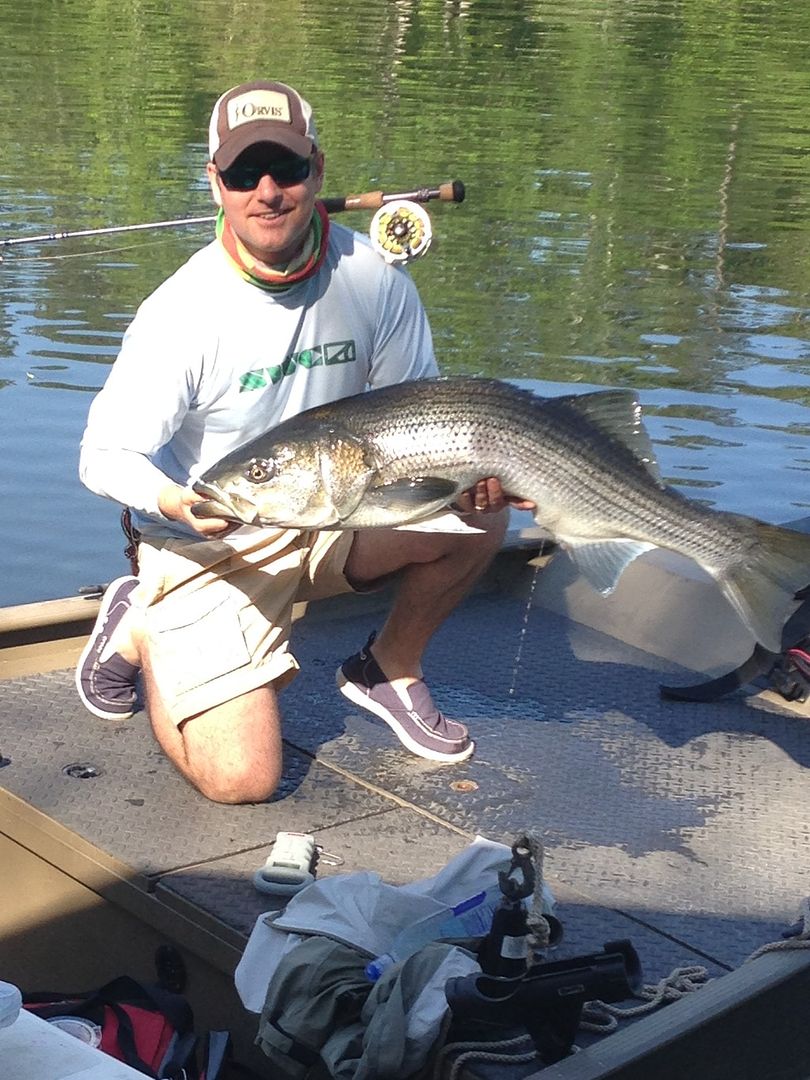
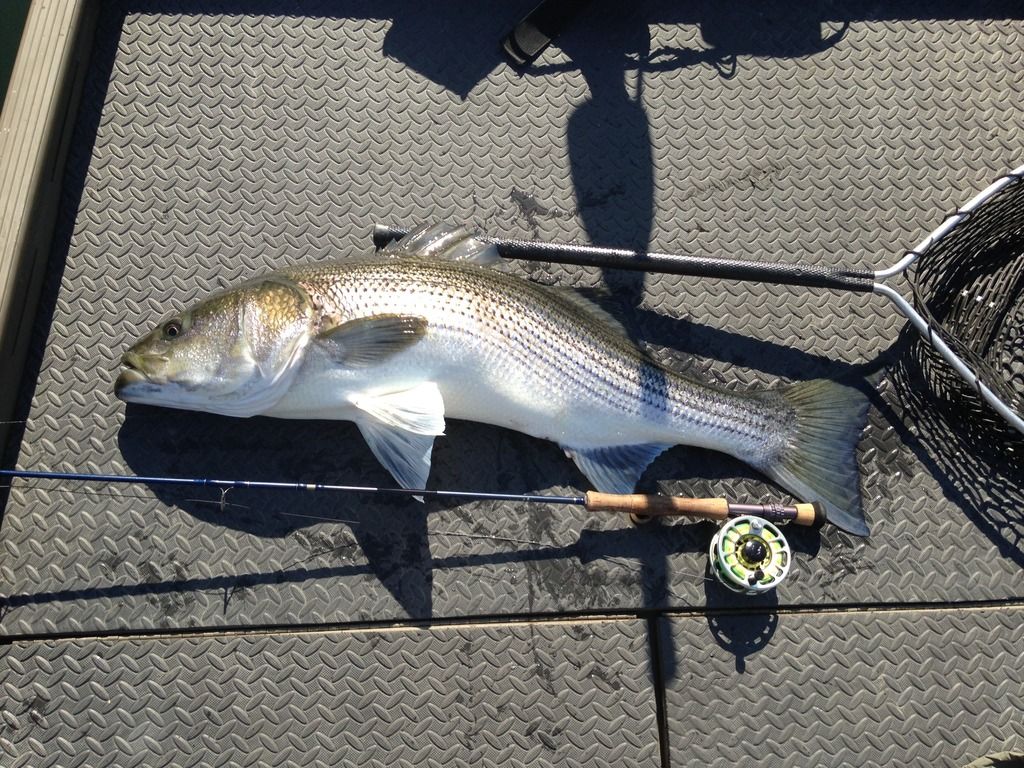
Yesterday the work finally paid of. And paid off big. I hooked into this pig that tipped the scale at 25lbs. Took almost 15 minutes to get in, and was wrapped up in heavy weeds on the bottom for a couple minutes where I figured I'd lose her. I knew it was a big fish when I set the hook, but didn't know how big until I got a glimpse of her. I could do very little to stop her with my 8wt. She just towed my around at her own pace. No dramatic long runs, just strong bulldog style fight. It reminded me a lot of a redfish. I've only caught 5-10lb stripers before, and they are much more athletic. She was spawned out, so she might have been a bit lethargic. She could have gone close to 30lbs if she wasn't so skinny. Regardless, it smashed my previous personal best by 15lbs. I was fishing by myself, but thankfully I spotted a guy on a dock nearby to take a few pictures real quick before letting her go.
They say a trophy is measured by the effort invested in its acquisition. I'd say this one qualifies.
So after having my boat for a bit, I decide it needed some much
needed upgrades. First was upgrading the 12v 40lb thrust trolling motor,
second was installing some type of 'Hydroturf' flooring. Also when I was
working under the front deck, I figured I'd put in 3 rod tubes to allow my fly
rods to be assembled while in the side rod holders.
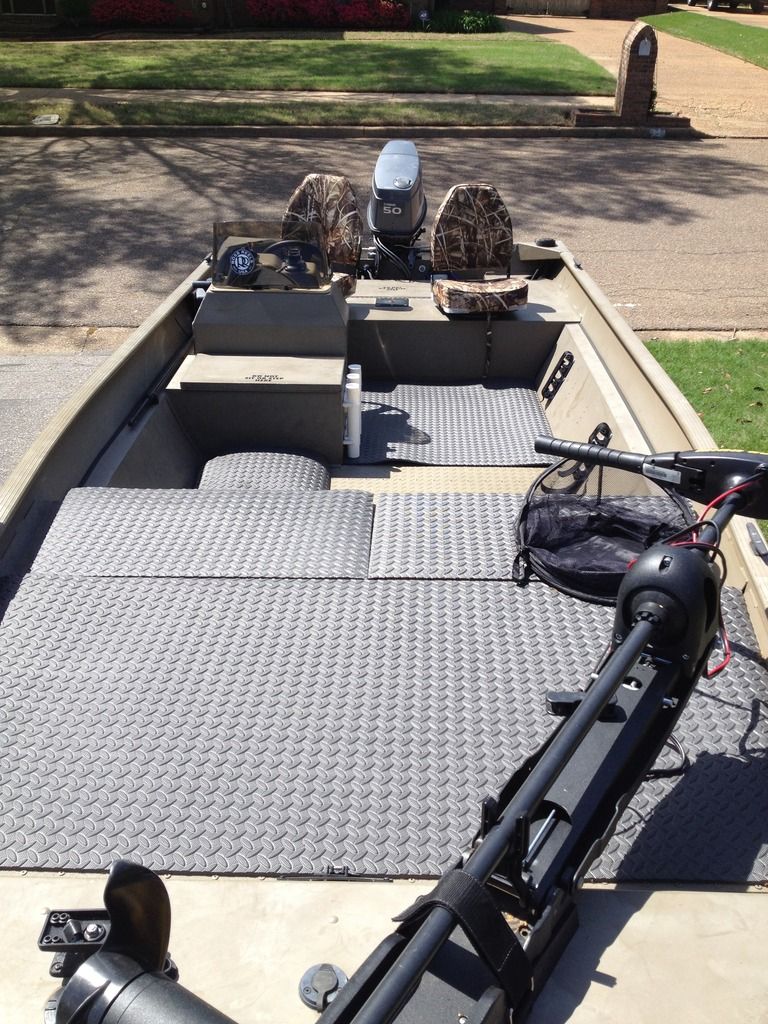
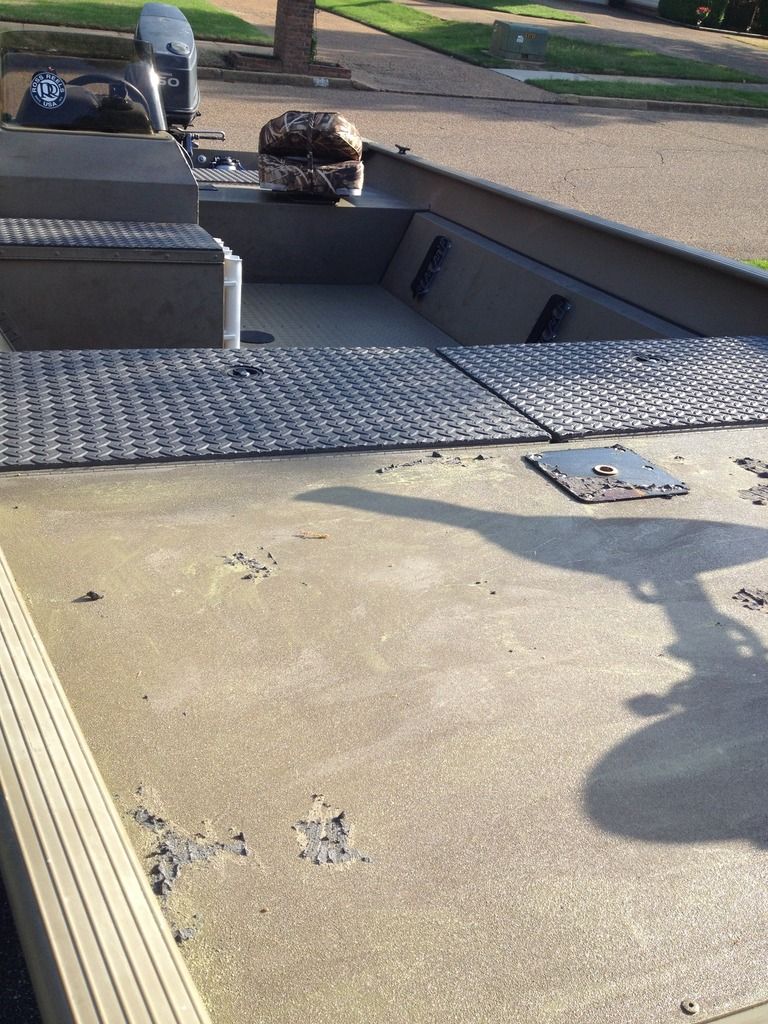
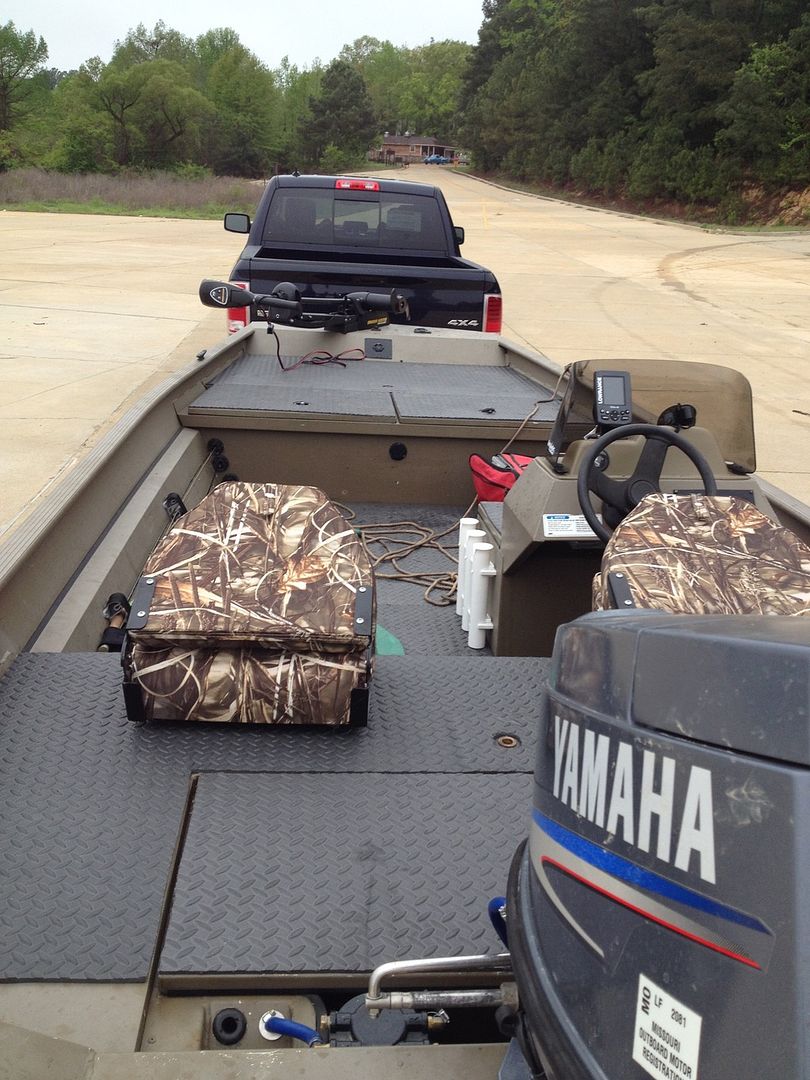
You can see the general layout of my boat
here:
So I tackled the battery issue first.
I bought a 70lb 24v hand control trolling motor, and the next issue to
tackle was where to put the extra battery. In my particular model, the 20
gal gas tank is in the back, along with the deep cycle, and starting battery.
Adding a third battery I felt would simply be too much weight in a back
of the boat. It already sat a bit low in the back with 1 person and a
full tank of gas. My mission was to figure out how to put the 2 deep
cycles up under the front deck.
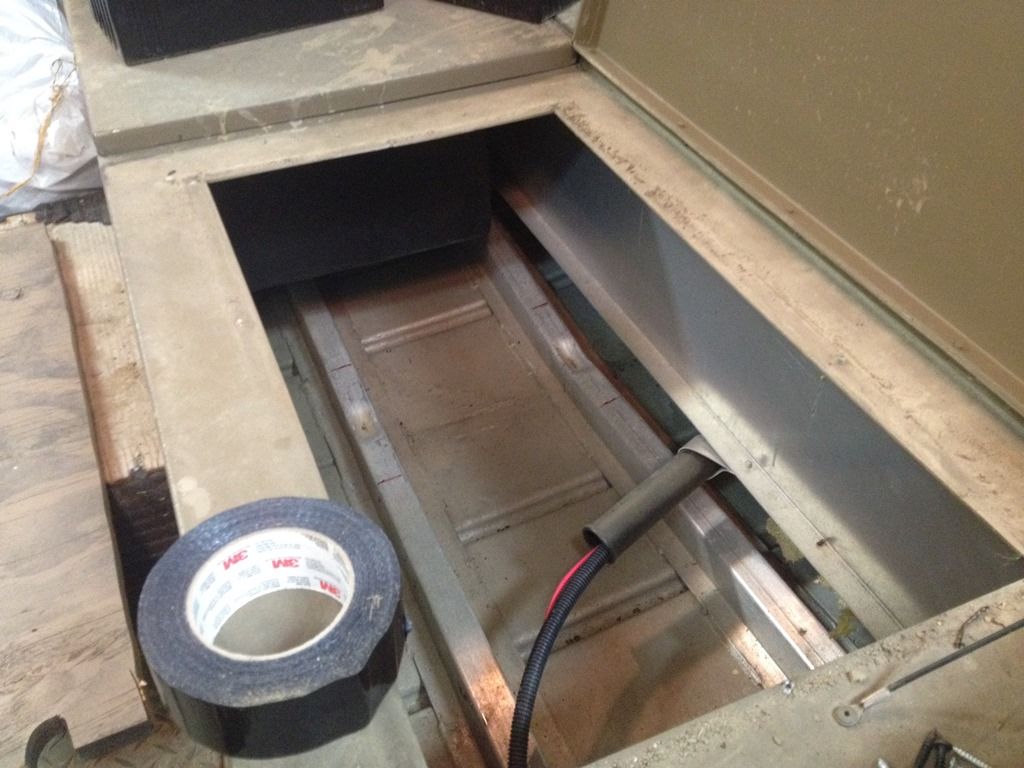
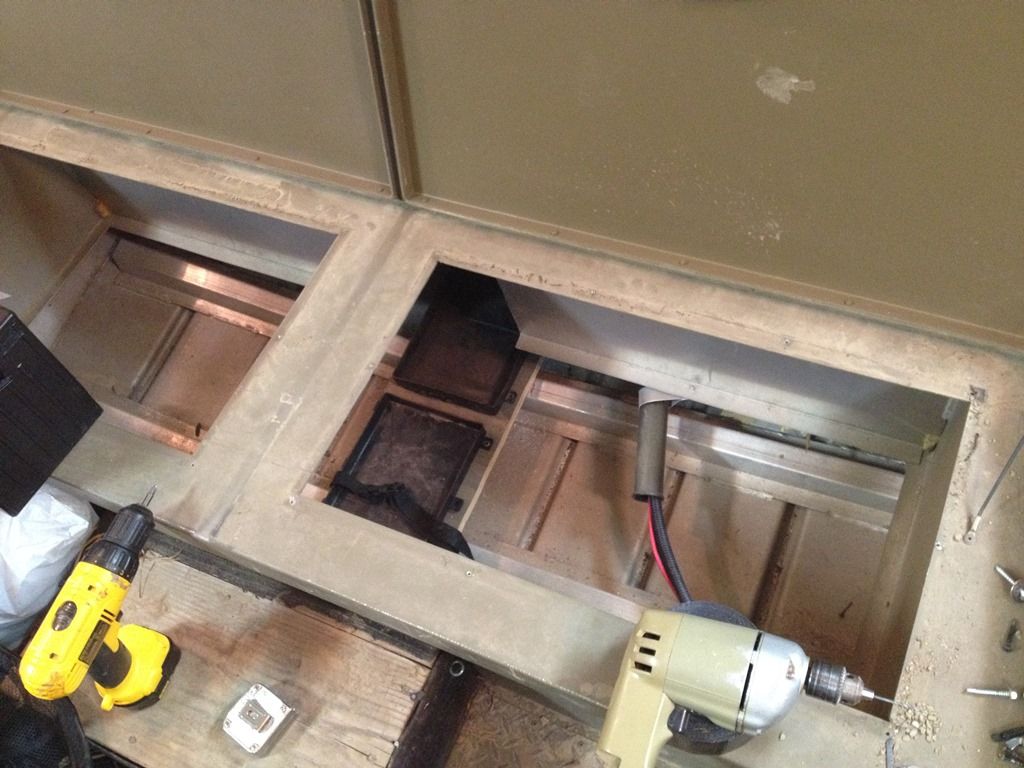
I took out the storage bins to see what
was doing underneath. You can see the "firewall" in front of
the boxes in the picture below. That whole area forward is solid foam for
emergency flotation. There is a channel that runs down the middle that
just so happens to be about as wide as a battery conveniently. Since 2
batteries would not fit in the open area if I wanted to keep the storage bins
in use, I had to cut that "firewall" to make room.
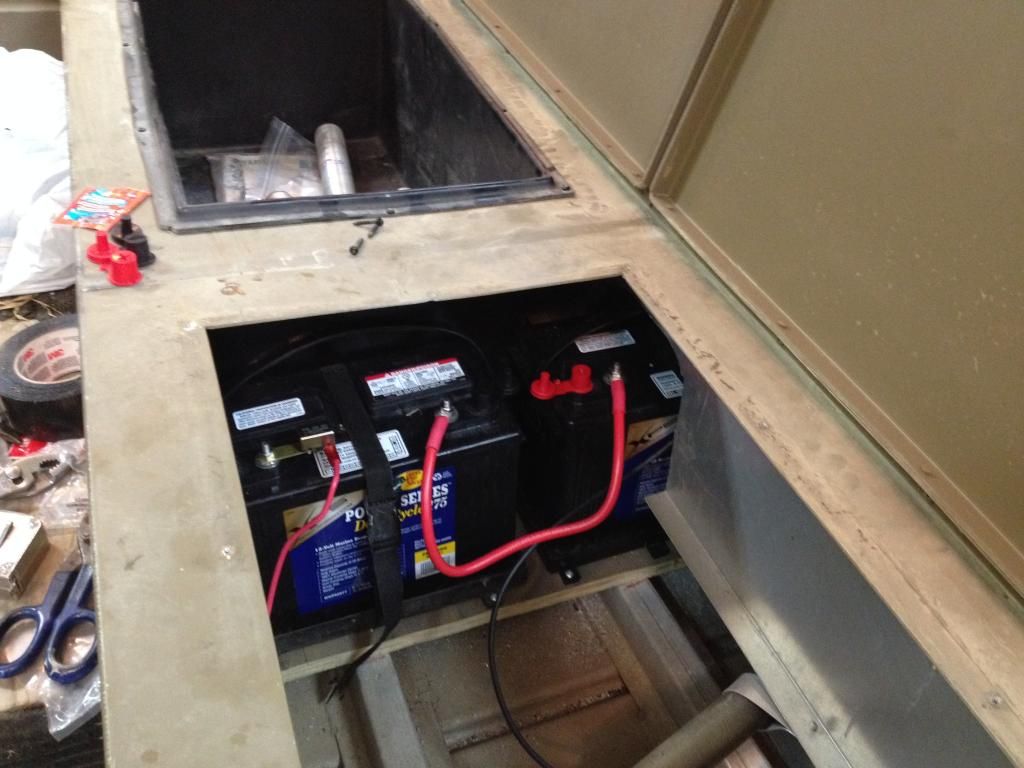
I then mounted a 1/2" piece of
painted plywood with rubber shower pan material under the plywood (to reduce vibration, and create something of rubber washer/gasket effect) to mount the battery trays to. It fits snug as a bug.
Cutting the "firewall" was a major pain just because of the
angles I had to hold the jig-saw. I broke off a few blades in the
process. I put some rubber trim in the cutout area because it is super
sharp, and I couldn't really reach in there well enough to smooth it off
sufficiently.
I checked the fit before bolting everything in permanently.
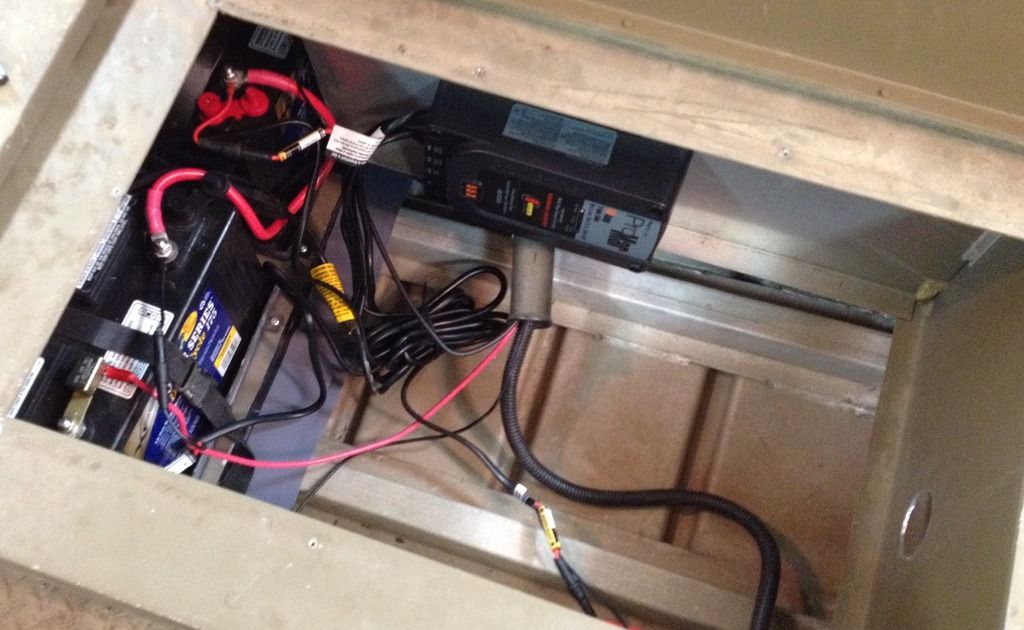
After installing the batteries and wiring them in series to be 24v, I snapped them in.All I had to do was wire up the on-board
charger and charging port.
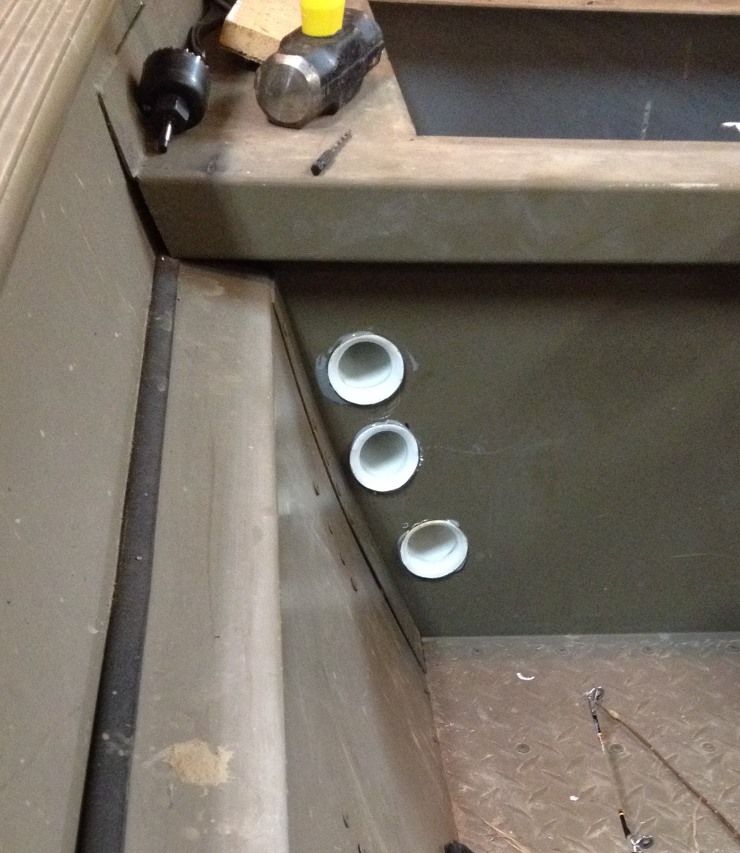
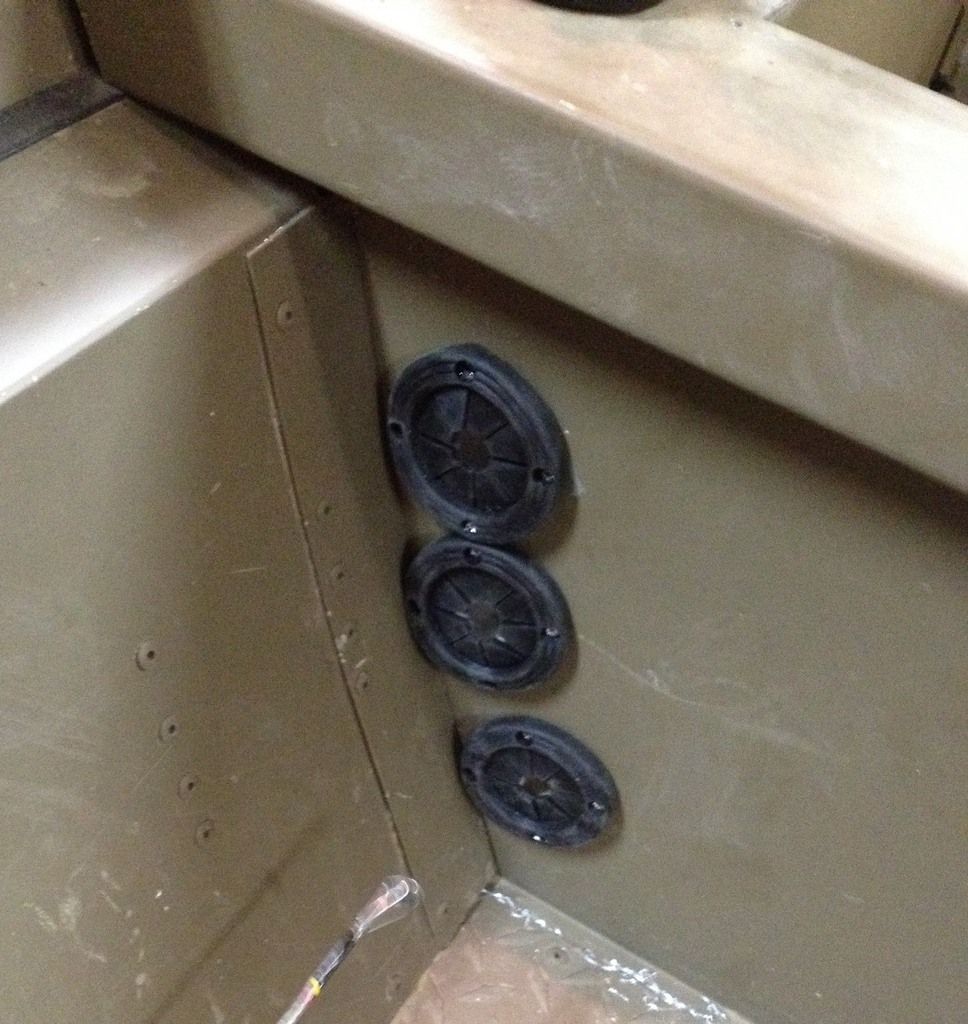
Before bolting the storage bins back in, I installed the rod tubs
on the side by using a hole saw the diameter of the 1 ½” PVC pipe. I flared the end using the heat gun I had
used in all the wiring to heat the end, and then squished the PVC over the neck
of a beer bottle. It worked like a
charm. I covered the pipes with rubber
electrical grommets purchased at www.customgheenoe.com.
I put the boat on the water the next weekend and it
sat almost dead flat in the water. I
certainly allowed me to draft a couple inches less.
On top of that, it got on plane almost twice as fast as before, and will
get on plane at lower speeds. The only
downside is I can’t get the nose up as much with the extra weight up front, and
I lost between 1 and 2 mph off my top speed.
The positives drastically outweigh the one negative. Here's the video summarizing step by step:
Next was upgrading the flooring. I looked into Hydro Turf, and discovered that
there is an EVA foam you can buy for about $20 for a 4’x8’ sheet that a lot of
folks were using instead. The brand is ‘Best
Step’. It feels similar to a yoga mat,
but much sturdier, all while weighing next to nothing. It’s the exact same material as Hydro
Turf. It's made of the same EVA high
density foam as Hydro Turf and feels almost identical.
Lot's of other folks get it from Sears. In fact you will find posts online referring
to it as “Sears Hydro Turf”.
It took 4 rolls to do an 1860 boat (well 5 since I
trashed one roll which I’ll explain how to avoid doing so). Can't rave enough about the stuff, and every
single review I read from folks that put it on their boat absolutely love it. The sound insulation benefits alone make it
worth doing on top of comfort on your feet, and not burning my skin in the hot
weather when barefoot or sitting on the deck. I have have been modestly rough
with it, and it shows no signs of wear. It
cleans up super easy too. Plus each roll
weighs next to nothing. Putting it in my
boat might have added 10-15 lbs including adhesive. It wasn’t quite as easy to install as I hoped
since I did it without a second set of hands, but it was by no means difficult. An extra person to help you line it up lay it down when you've applied adhesive would be a big help.
Doing this on a warm day is important as it relaxes
the material more, and it will lay flat for you. You will use Weldwood adhesive applied with a
foam roller. For 4 rolls, adhesive, and
the cheap roller, the project cost about $100.
I measured and laid out the floor after cutting it
out to make sure it lined up.
Here's after I put the glue down and didn't line it
up right thinking I could adjust it a little before the glue stuck...I was
wrong. When using Weldwood contact
cement, you put it on the boat, and the foam flooring, and let it dry for 5-10 mins
before laying down the floor. Note that
AS SOON as it touches each other, it's stuck for good (unless you want to tear
it off in tiny pieces like I had to).
Here it is done.
Sorry for no detailed install pics: